
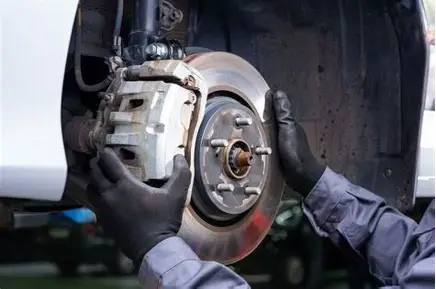

Required Personal Protective Equipment (PPE)
-
Safety boots/shoes
-
Safety glasses or goggles
-
Dust mask or respirator (for brake dust)
-
Rubber or mechanic gloves
-
Work overalls or long-sleeved clothing
Tools and Equipment
-
Vehicle hoist or jack with stands
-
Socket/ratchet set and wrenches
-
Screwdrivers or pry bars
-
Brake cleaner and rags
-
New brake pads
-
Torque wrench
-
C-clamp or brake caliper tool
-
Safety signage / wheel chocks
Step 1: Prepare Work Area and Vehicle
-
Hazards: Vehicle instability, trip hazards, crush injury.
-
Controls: Use wheel chocks, ensure level surface, display warning signage, verify hoist or jack stability.
-
Responsible: Mechanic / Supervisor
Step 2: Lift or Hoist Vehicle
-
Hazards: Vehicle falling, hydraulic failure, pinching.
-
Controls: Inspect hoist or jack, lift slowly, position safety locks, no one under vehicle unless secured.
-
Responsible: Mechanic
Step 3: Remove Wheels
-
Hazards: Dropping wheel, hand crush injuries.
-
Controls: Use proper lifting technique, lift with team if heavy, set wheels away from work area.
-
Responsible: Mechanic
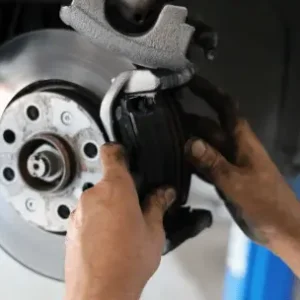
Step 4: Remove Brake Calipers and Hardware
-
Hazards: Pinch points, strain injuries, brake fluid contact.
-
Controls: Wear gloves, support caliper with hanger or rope (do not let hang on brake hose), use proper tools.
-
Responsible: Mechanic
Step 5: Remove Old Brake Pads
-
Hazards: Sharp edges, brake dust inhalation, chemical exposure.
-
Controls: Wear dust mask, gloves; use brake cleaner to minimize dust; dispose of pads according to environmental guidelines.
-
Responsible: Mechanic
Step 6: Inspect Hardware and Components
-
Hazards: Cuts from sharp edges, crushing hands.
-
Controls: Use inspection light and gloves; check caliper pins, rotors, and brake lines; identify worn parts.
-
Responsible: Mechanic
Step 7: Install New Brake Pads
-
Hazards: Incorrect installation, pinching, tools slipping.
-
Controls: Follow manufacturer instructions, ensure pads seated correctly, verify caliper pistons compressed safely using C-clamp.
-
Responsible: Mechanic
Step 8: Reinstall Calipers and Wheels
-
Hazards: Strain injuries, pinch points, cross-threading bolts.
-
Controls: Torque bolts to specification, use proper lifting technique, double-check placement.
-
Responsible: Mechanic
Step 9: Lower Vehicle and Test Brakes
-
Hazards: Vehicle falling, brake failure.
-
Controls: Remove stands safely, perform pedal pressure test, test drive at low speed first.
-
Responsible: Mechanic/Supervisor
Step 10: Clean Up and Dispose of Waste
-
Hazards: Slip/trip hazards, environmental contamination.
-
Controls: Collect used pads, clean work area, store tools properly, dispose of waste according to environmental regulations.
-
Responsible: Mechanic
Emergency Measures
-
First aid kit nearby
-
Fire extinguisher accessible
-
Eye wash station if chemical exposure occurs
Notes
-
Always involve at least one experienced worker in the task.
-
Conduct pre-job briefing (toolbox talk) to highlight hazards.
-
Review and update JSA if conditions change, after incidents, or at least annually.
This plan ensures hazard awareness and mitigates risks at each step for a safe brake pad replacement.



Reviews
There are no reviews yet.