
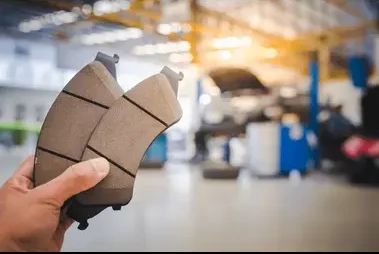

- Preparation & Safety
- Park the car on a flat surface.
- Engage the parking brake.
- Wear safety gloves and goggles.
- Gather tools: jack, jack stands, lug wrench, C-clamp, socket set, and new brake pads.
- Loosen Lug Nuts
- Slightly loosen the wheel lug nuts while the car is still on the ground (do not remove them yet).
- Lift the Vehicle
- Use a jack to lift the car.
- Secure it with jack stands for stability.
- Remove the Wheel
- Fully remove the loosened lug nuts.
- Take off the wheel to expose the brake assembly.
- Access the Brake Caliper
- Locate the caliper bolts and remove them.
- Carefully slide the caliper off the rotor (support it with a wire or bungee cord—don’t let it hang by the brake hose).
- Remove Old Brake Pads
- Slide out the worn brake pads from the caliper bracket.
- Take note of their orientation for correct installation.
- Compress the Caliper Piston
- Use a C-clamp or brake tool to gently push the piston back into the caliper housing.
- This creates space for the new pads.
- Install New Brake Pads
- Place the new pads into the caliper bracket in the same position as the old ones.
- Ensure they are seated securely.
- Reattach the Caliper
- Position the caliper over the new pads.
- Reinstall and tighten the caliper bolts.
- Reinstall the Wheel
- Put the wheel back on.
- Hand-tighten the lug nuts.
- Lower the Vehicle
- Remove jack stands and lower the car.
- Fully tighten the lug nuts in a crisscross pattern.
- Test the Brakes
- Pump the brake pedal a few times to seat the pads.
- Take a slow test drive to ensure proper braking.
Job Safety Analysis (JSA)
1. Preparation and Required Equipment
-
Safety or steel-toe boots
-
Safety glasses or goggles
-
Dust mask/respirator
-
Gloves (rubber and/or mechanic gloves)
-
Hydraulic floor jack and jack stands
-
Lug wrench or breaker bar
-
Socket and hex bit sets
-
C-clamp for piston retraction
-
Mechanic’s gloves and shop towels
-
Brake cleaner, high-temperature brake lubricant, and anti-seize grease
2. Job Steps and Hazard Identification
|
Job Step
|
Potential Hazards
|
Control Measures
|
|---|---|---|
|
Set up vehicle on hoist or floor jack
|
Vehicle slipping or falling
|
|
|
Remove wheels
|
Heavy lifting, pinching fingers, loose hardware
|
Use proper lifting technique, wear gloves, keep nuts/bolts organized with tray
|
|
Remove caliper and bolts
|
Sharp edges, pinch points, overexertion
|
Use appropriate tools, wear gloves, avoid awkward body angles
|
|
Remove brake pads
|
Exposure to brake dust (toxic), sharp edges
|
|
|
Compress caliper piston
|
Pinch points, sudden spring-back
|
Use proper C-clamp or piston tool, maintain firm grip
|
|
Install new pads and reassemble
|
Strain, improper torque
|
Follow manufacturer torque specs, use correct seating, avoid twisting wrists
|
|
Test brakes after installation
|
Residual dust, accidental movement
|
Ensure vehicle secured, wear gloves, observe procedure safely on level ground
|
3. Risk Assessment
-
Inhalation of brake dust (respiratory injury)
-
Vehicle falling while jacked (crush injuries)
-
Lacerations from sharp edges or tools
-
Muscle strain from lifting wheels or calipers
-
Eye injury from flying debris during cleaning
4. Control Measures
-
Elimination/Substitution: Work in well-ventilated areas to reduce dust exposure; use pre-cleaned pads or low-dust materials if available.
-
Engineering Controls: Use jack stands, proper tools, and firm support for vehicle; maintain clean workspace.
-
Administrative Controls: Follow a step-by-step shop manual, train workers, and provide supervision.
-
PPE: Gloves, dust masks, safety glasses, and boots are essential for protection
5. Best Practices
-
Conduct the procedure on a level, stable surface.
-
Involve two workers for lifting heavy components to reduce strain.
-
Regularly review and update the JSA, especially if new tools or brake systems are introduced
2 -
Dispose of brake dust and used materials safely.
-
Keep a First Aid kit nearby in case of cuts or eye exposure.
6. Documentation and Review
-
Maintain a recorded JSA form with job steps, hazards, controls, and assigned responsibilities for accountability
1 -
Perform periodic reviews, after incidents, or when procedures change.
-
Ensure all technicians acknowledge awareness of hazards and procedures.
Vehicle Lifting and Safety Equipment Required:
-
Hydraulic floor jack or bottle jack to lift the vehicle off the ground
-
Jack stands to safely support the vehicle during repair
. Never rely solely on a jack.
-
Wheel chocks to prevent the vehicle from rolling
Essential Materials Required:
-
New brake pads: Ensure they are compatible with your vehicle make and model; they may be ceramic, semi-metallic, or organic
-
Brake hardware kits: Includes anti-rattle clips, shims, and sometimes spring washers to secure pads and reduce noise
-
Brake rotors (optional): Replace or resurface if worn or damaged for optimal performance
-
Brake fluid: Typically DOT 3 or DOT 4; check your vehicle manual for specifications
-
Brake lubricant/grease: High-temperature brake grease for caliper slide pins and pad contact points
-
Brake cleaner: Non-chlorinated aerosol spray to remove grease, oil, and dust from rotors and caliper surfaces
-
Rags or shop towels: For cleaning components and handling brake fluid
Hand Tools
-
Socket and wrench set: Metric and SAE sockets (12–15 mm commonly used for calipers) and ratchets for bolts
-
Torque wrench: To tighten caliper bolts and lug nuts to manufacturer-specified torque
-
Flathead screwdriver or pliers: For removing clips and prying off pads
-
Crescent wrench: Optional if not using a socket set
-
Lug wrench or tire iron: For loosening and reinstalling wheel lug nuts
Specialized Brake Tools (Optional but Recommended)
-
C-clamp or caliper piston compression tool: For retracting the caliper piston to fit new pads
-
Caliper wind-back tool: Necessary on rear brakes with integrated parking brake mechanisms
-
Wire or bungee cord: To hang the caliper safely and prevent stress on brake hoses
-
Wire brush: For cleaning caliper bracket slide channels and rotors
-
Small tubing/hose or turkey baster: To remove excess brake fluid from the master cylinder when compressing the piston
Lifting and Safety Equipment
-
Floor jack: Hydraulic, rated for your vehicle weight (avoid scissor jacks for repair work)
-
Jack stands: Two per vehicle side, rated for the vehicle weight, for safe support
-
Wheel chocks: To prevent movement of vehicle during lifting
-
Safety gloves: Mechanic gloves to protect hands
-
Safety glasses: Protect eyes from debris or brake dust
-
Dust mask: Especially when working with older brake systems that may contain asbestos
Additional Considerations
-
Shop repair manual: Provides step-specific torque specs, caliper removal procedures, and safety tips for your vehicle
-
Brake pad wear sensors: If your vehicle is equipped with them, these should be replaced with the pads
-
High-quality anti-seize lubricant: Optional for brake rotor hub surfaces to prevent corrosion
Summary

Reviews
There are no reviews yet.